
Designing Custom Mallets: Part 1
- Dec 28, 2025
- 5 min read
What Variables Do Mallets Have?
Using the wrong mallet, whether it’s too soft, too hard, too small, or just the wrong material or shape; can make a singing bowl sound weak, sharp, or shaky with unpleasant chatter. The right mallet, however, can help the bowl sing smoothly with clearer tones and richer harmonics. I’ll be experimenting with different mallet features and sharing what I learn in future articles on this site. Over time, my goal is to discover what works best for different bowls so I can create an ideal set of mallets and help others make or choose their own custom tools.
What Mallet Qualities Could Matter?
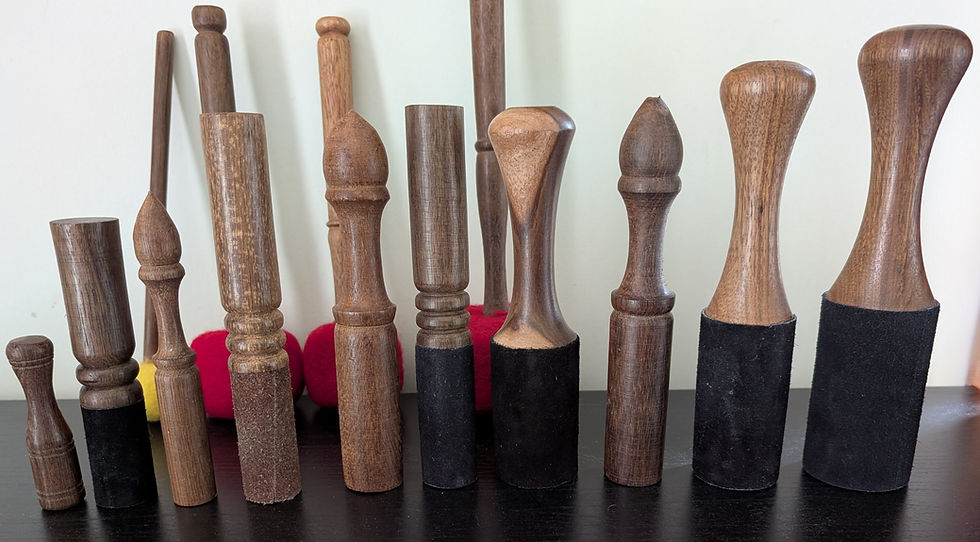
When you hold a singing bowl mallet in your hand, it may look simple—but every part of its design can shape the sound that comes out of the bowl. Different woods vibrate differently, grains absorb or transfer energy in their own ways, and even the material touching the rim can completely change how a bowl responds. As I begin exploring what truly affects playability and tone, these are the qualities I believe could have the biggest impact:
Wood type and density
Direction of the wood grain
Surface material that contacts the rim (wood, suede, felt, rubber, leather, etc.)
Width of the mallet compared to the bowl’s rim
Length of the mallet in relation to the bowl’s height
Shape and comfort of the handle or grip
Whether the mallet is machine-made or handmade
Each of these variables may influence how smoothly a bowl thrums, how quickly it reaches its voice, and how much control a player truly has. My goal is to explore them one by one and discover how much of a difference they really make.
My Hypothesis
From years of listening closely to the subtle quirks and personalities of singing bowls, I’ve started to form a working hypothesis about what makes an optimal mallet; one that gives the player the widest, most expressive range without slipping into chatter or losing control.
Resistant to Chatter — The ideal mallet should let you thrum comfortably without hitting the point where the mallet starts to rattle or jump. If mallet A begins to chatter at 60 RPM but mallet B holds steady until 70 RPM, mallet B gives you more room to play intuitively without accidentally crossing that threshold. (For more on maximum RPM, see Singing Bowl Playing: Advanced.)
Dense Wood — I believe denser woods will help widen that usable range. Higher density means greater inertia to overcome, which may make the mallet less likely to bounce on–off the rim during thrumming. In theory, a heavier mallet should maintain smoother contact and delay chatter.
Burl Grain — While straight-grain woods are excellent at transferring energy, burl wood behaves differently: it absorbs more of that energy instead of sending it back into the bowl. My suspicion is that this absorption reduces the feedback loop that leads to chatter, allowing for more stable thrumming.
Suede vs. Wood — Wooden surfaces tend to reach chatter at lower speeds, but they also bring out certain overtones that suede cannot. Suede padding is more forgiving and produces a warmer foundation, but I don’t plan to refine suede options until I can study the finer physics of its interaction with bowl surfaces.
Standardised Sizes — Free mallets vary wildly in size and shape, which makes meaningful comparison difficult. While larger bowls often pair well with larger mallets, I haven’t found size alone to determine effectiveness. To keep this experiment controlled, I’ll be turning my mallets in three repeatable standard sizes:
20 mm diameter, ~6" length
25.4 mm diameter, ~6" length
30 mm diameter, ~6" length
These consistent dimensions will allow me to isolate wood type, density, and grain as the main variables—and, hopefully, reveal which combinations truly make a singing bowl thrum at its best.
Where To Begin?

To understand how different woods shape the voice of a singing bowl, I’m beginning an experiment: crafting eight complete sets of mallets, each made from a different timber. Every set will help answer a simple question "how much does the material in your hand change the sound you hear?" These are the mallets I plan to make and test, one by one.
Tasmanian Oak Set — This local timber, with a grain and density similar to Western oak, will serve as my “baseline.” These mallets will become my standard for comparison as I explore more unusual woods.
Black Walnut Set — A familiar choice in the West and commonly used for "free" singing bowl mallets. This set will be my bridge between the everyday and the exotic, showing how traditional choices hold up against more experimental materials.
Spotted Gum Set — A denser Australian hardwood, close in grain to Tasmanian Oak but much heavier. This set will help me learn how increased density affects tonal clarity, responsiveness, and the maximum “RPM” at which a bowl can be thrummed.
The "Blue Sticks" — Dyed and treated maple burl and birch, and the set I’m secretly rooting for. These will be my most personal mallets—beautiful, experimental, and the ones I hope perform best if the tests prove promising.
Padauk Set — Padauk is widely used in musical instruments for its resonance and strength. I want to explore whether its musical heritage translates into noticeable tonal changes when playing a bowl.
Ebony Set — One of the densest woods used in instrument building. These mallets will push density to the extreme to see what happens when the material is as heavy and rigid as possible.
Mango Set — A native species of northeast India, mango wood connects directly to the regions where singing bowls were first produced in the 1970s. This set will help test what a truly local mallet might have performed like during the bowl’s creation in its early years.
Amboyna Burl Set — Chosen for its striking grain and a density close to standard mallets. Here the focus is on how grain structure alone,not weight; may influence tone, friction, and the feel of thrumming.
Where From Here? Part 2

With everything I’ve learned so far, the next step is to finally put theory into practice. I’ve purchased a woodturning lathe specifically for this project; a tool that will let me shape each mallet with intention rather than guesswork. In Part 2, I’ll begin by crafting the first full set: the Tasmanian Oak mallets, my baseline for all future comparisons.
Once they’re made, I’ll test them side by side with the common “free” mallets that come with most singing bowls, using an oscilloscope to see how their vibrations differ and where they overlap. This will be the moment where ideas become data, and where each mallet begins to reveal its voice.


Comments